Stain Removal Techniques: Pro Tips for Car Interiors (2026)
Spills and stains are part of real car life. Coffee on the commute, muddy cleats after practice, a leaky takeout bag, or that mystery spot that ?wasn?t there yesterday.? The difference between a car that feels clean and one that feels permanently grimy often comes down to how fast you act?and whether you?re using the right cleaning method for the right material.
This guide is built for car owners who want results without ruining upholstery, fading trim, or leaving that sticky residue that attracts even more dirt. You?ll learn how to identify common stain types, choose the best stain removal products for your interior, and use step-by-step techniques for fabric, leather, vinyl, and carpets. You?ll also see common mistakes that lead to water rings, discoloration, and lingering odors?plus how to avoid them.
If you?re shopping for cleaners, you?ll find practical comparisons and what to look for on labels. If you already have products in your garage, you?ll get a process that helps you use them safely and effectively.
Start Here: The 60-Second Stain Assessment
Before you spray anything, take a quick moment to assess what you?re dealing with. The right approach depends on two things: the interior surface and the stain type.
1) Identify the surface
- Carpet/floor mats: most absorbent; can hide stains and odors deep in fibers
- Cloth seats: similar to carpet but often tighter weave and backed with foam
- Leather: sensitive to harsh chemicals; needs minimal moisture
- Vinyl (synthetic leather): more chemical-resistant than leather, but can still stain and gloss up
- Plastics/trim: prone to streaks, whitening, and dye transfer
2) Identify the stain type
- Protein: milk, blood, sweat, egg, bodily fluids
- Tannin: coffee, tea, wine, fruit juice
- Oil/grease: food oils, lotion, makeup, motor grime
- Dye transfer: denim, new clothing, marker, kids? art supplies
- Organic/mud: dirt, grass stains, sand, road salt
Real-world example: A latte spill on a cloth seat is usually a tannin stain with oils and milk proteins mixed in?so a single ?one-size? cleaner may struggle. That?s why a gentle all-purpose interior cleaner plus an enzyme cleaner can outperform a single harsh product.
Buying Guide: What to Look for in Stain Removal Products
Car interior stains are all about chemistry and control. Here?s how to choose products that work without damaging materials.
Core product categories
- Interior APC (All-Purpose Cleaner) or dedicated upholstery cleaner: your everyday workhorse for cloth, carpet, many plastics (when diluted properly).
- Enzyme cleaner: best for protein-based stains and odors (milk, sweat, pet messes). Enzymes ?digest? organic material instead of just masking it.
- Foaming fabric cleaner: lifts dirt to the surface and reduces over-wetting; great for seats and headliners.
- Leather cleaner + leather conditioner/protectant: pH-balanced cleaner for safely removing grime without stripping the finish.
- Stain spotter/oxidizer: useful for tannin stains like coffee and tea (use carefully and spot-test).
- Odor neutralizer: pairs well with stain removal when the smell lingers (especially in carpet padding).
Tools worth buying (they matter as much as the chemicals)
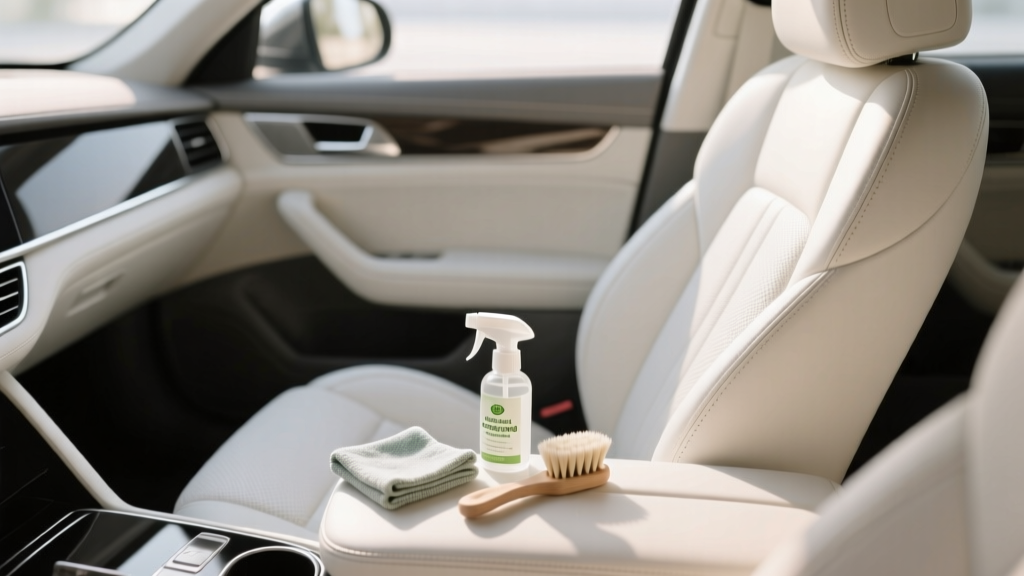
- Soft interior brush (boar?s hair or similar) for agitation without fraying fibers
- Microfiber towels (multiple?stain removal is a blot-and-switch game)
- Wet/dry vacuum or extractor for pulling moisture and dissolved grime out of carpet and cloth
- Spray bottle for dilution control (especially with concentrates)
- Steam cleaner (optional) for sanitizing and loosening grime?use cautiously on adhesives and delicate materials
Label features that signal a smart purchase
- Material compatibility: upholstery-safe, leather-safe, vinyl-safe, etc.
- Clear dilution ratios for concentrates (more control and better value)
- Low residue / no sticky finish (residue attracts dirt and causes re-soiling)
- Low odor / no harsh solvents for tight cabins
- pH-balanced for leather; enzyme-based for organic/protein stains
Step-by-Step: Universal Stain Removal Method (Works for Most Situations)
Use this process as your default. It reduces damage and increases success rate, especially when you?re not 100% sure what the stain is.
Step 1: Act fast and blot (don?t rub)
- Remove solids with a spoon or plastic card.
- Blot liquids with a clean microfiber towel or paper towel.
- Work from the outside edge toward the center to avoid spreading.
Step 2: Dry vacuum first (for dirt and grit)
For mud, sand, or anything gritty: vacuum before adding liquid cleaner. Scrubbing grit into fabric is a fast way to create a fuzzy, worn patch.
Step 3: Spot test
Test any product on a hidden area (seat edge, under the seat, trunk corner). Look for:
- Color transfer onto the towel
- Lightening/darkening
- Texture changes (stiffness, fuzzing)
Step 4: Apply cleaner to the towel or brush, not directly (when possible)
This prevents overspray on adjacent trim and avoids saturating foam underneath seats.
Step 5: Agitate gently and blot/extract
- Lightly brush in short strokes.
- Blot with a clean towel, flipping frequently.
- If you have a wet/dry vac or extractor, pull moisture out immediately.
Step 6: Rinse lightly (the secret to preventing re-soiling)
Many stains ?come back? because soap residue remains. Lightly mist plain water, then blot/extract again.
Step 7: Dry thoroughly
- Leave doors open, run fans, or use the car?s HVAC on fresh air.
- Aim for fast drying to prevent musty odors and water rings.
Techniques by Material: Cloth, Carpet, Leather, and Vinyl
Cloth seats: coffee, soda, sweat, and food
Best product types: upholstery cleaner/foam + enzyme cleaner (for milk/protein or lingering odor).
- Blot the spill immediately.
- Apply upholstery cleaner, agitate gently with a soft brush.
- Blot/extract until the towel comes up mostly clean.
- If odor remains (milk, sweat), apply enzyme cleaner and let it dwell per label directions.
- Light rinse with water, then extract and dry.
Tip: If you see a faint ?ring,? you likely spot-cleaned too tightly. Lightly clean a wider area around the stain to blend.
Carpet and floor mats: mud, salt, and greasy footprints
Best product types: APC (properly diluted) + degreaser for heavy grime + extractor/wet vac.
- Remove mats and dry vacuum thoroughly.
- For salt stains: mist water first to dissolve salt, then clean. (Scrubbing salt dry can grind it in.)
- Spray cleaner, agitate with a carpet brush.
- Extract. Repeat in small sections until the water being extracted looks clearer.
- Rinse with minimal water and extract again.
Real-world example: Winter road salt often looks ?gone? after a wipe, but returns as it dries. Dissolving it with water first, then extracting, prevents the reappearance.
Leather seats: dye transfer, body oils, and spills
Best product types: dedicated leather cleaner + soft brush + leather protectant/conditioner.
- Vacuum seams and perforations first to avoid grinding dirt into the leather.
- Apply leather cleaner to a microfiber towel (or brush), not directly to the seat.
- Gently clean in sections; use a soft brush for textured grain.
- Wipe dry with a clean towel.
- Apply leather protectant/conditioner per label instructions.
Tip: Many ?leather stains? are actually contamination on the leather?s protective coating. Aggressive solvents can dull or damage that coating?stay pH-balanced and gentle.
Vinyl and plastic trim: scuffs, dye, and sticky residue
Best product types: interior APC (mild) + dedicated interior detailer; for adhesives, use a plastic-safe adhesive remover sparingly.
- Wipe loose debris with a damp microfiber.
- Use APC diluted as directed; wipe and repeat rather than scrubbing hard.
- For sticky residue, apply a small amount of plastic-safe remover to a towel and dab?don?t flood.
- Finish with an interior protectant for a factory-matte look (avoid greasy shine).
Product Recommendations and Comparisons (What to Buy for Your Kit)
You don?t need a cabinet full of bottles. A well-chosen ?stain kit? covers most problems and keeps you from reaching for harsh household cleaners.
The essential 5-piece stain removal kit
- Upholstery/carpet cleaner (foam or low-moisture liquid)
- Enzyme cleaner (odor + protein stains)
- Leather cleaner (if you have leather)
- Soft brush set (fabric + detailing brush)
- Wet/dry vacuum or access to an extractor (even a compact unit helps)
Foam vs. liquid upholstery cleaners
- Foam cleaners: great for light-to-medium stains, reduce soaking, easier for quick maintenance.
- Liquid cleaners: better for deep cleaning, but higher risk of over-wetting and odor if you don?t extract/dry well.
Ready-to-use vs. concentrate cleaners
- Ready-to-use: convenient, consistent strength, good for glovebox emergencies.
- Concentrates: best value, adjustable strength, ideal if you clean often (just follow dilution ratios).
Common Mistakes to Avoid (These Cause Permanent Damage)
- Rubbing instead of blotting: pushes stains deeper and frays fabric.
- Over-wetting seats: moisture sinks into foam and can create mildew smells that are hard to eliminate.
- Using household bleach or harsh cleaners: can discolor fabric, weaken fibers, and damage stitching.
- Skipping the rinse step: leftover soap residue attracts dirt, making stains return quickly.
- Using too much heat/steam on headliners: can loosen adhesive and cause sagging. For headliners, use minimal moisture and gentle blotting.
- Ignoring seat labels and material type: ?leatherette? and real leather behave differently; always treat accordingly.
- Not drying thoroughly: leads to water rings and musty odors, especially in carpet padding.
Pro Tips for Better Results (and Fewer Repeat Cleanings)
- Keep a small emergency kit: microfiber towel, waterless interior cleaner, and a mini stain spotter in the trunk.
- Work in small sections: faster feedback and better control.
- Use light passes instead of one aggressive scrub session.
- Extract whenever possible: pulling dissolved grime out beats wiping it around.
- Protect after cleaning: fabric protectants and leather protectants reduce future staining and make routine wipes easier.
FAQ: Stain Removal Techniques for Car Interiors
How do I remove old, set-in stains from car seats?
Start with vacuuming, then use an upholstery cleaner with agitation and extraction. Old stains often need multiple cycles: clean, blot/extract, light rinse, extract again. If odor is involved, follow with an enzyme cleaner and proper drying.
Can I use a Magic Eraser on leather or interior plastic?
Use extreme caution. Melamine foam is mildly abrasive and can dull leather coatings and shiny trim. If you use it at all, test first, use very light pressure, and keep it away from leather and glossy piano-black surfaces.
What?s the best way to remove coffee stains from cloth seats?
Blot immediately, then use an upholstery cleaner and extract. If the coffee had cream or milk, follow with an enzyme cleaner to prevent odor. Finish with a light water rinse and extraction to remove residue.
Why does my stain come back after it dries?
Usually it?s either wicking (moisture pulling remaining stain from deeper foam/fibers back to the surface) or leftover cleaner residue. Use less liquid, extract more thoroughly, and do a light rinse step before final drying.
How do I remove dye transfer (like blue jeans) from leather seats?
Use a dedicated leather cleaner and a soft brush first. Avoid strong solvents that can strip dye or damage the protective coating. For stubborn transfer, a leather-safe stain remover may be needed?always spot-test and follow up with protectant.
Is steam cleaning safe for car interiors?
It can be, but it?s easy to overdo. Steam is helpful for carpets and some fabrics when used with controlled moisture. Avoid heavy steaming on headliners, delicate adhesives, and heavily perforated seats where moisture can get trapped.
Next Steps: Build Your Stain-Removal Routine
If you want a cleaner interior year-round, aim for a simple rhythm:
- Weekly: quick vacuum + wipe high-touch areas
- Monthly: spot-clean new stains and refresh mats
- Seasonally: deeper carpet cleaning/extraction and protect fabric/leather
Start by assembling a small kit (upholstery cleaner, enzyme cleaner, soft brush, and microfiber towels). Then practice the universal method on a small area so you know how your interior responds. The more consistent you are, the less likely stains become ?permanent features.?
Want more practical interior care guides? Browse the latest cleaning, protection, and detailing tutorials on carinteriormix.com.